MakerGram Logo

    MakerGram

    • Register
    • Login
    • Search
    • Categories
    • Recent
    • Popular
    • Tags
    • Users
    • Groups
    1. Home
    2. arunksoman
    A
    • Profile
    • Following 3
    • Followers 2
    • Topics 0
    • Posts 25
    • Best 6
    • Controversial 0
    • Groups 2

    Arun K Soman

    @arunksoman

    Hai, My name is Arun K Soman. Completed my M.Sc Electronics from Cochin University of Science and Technology. Now I am working at Progressive Software Solutions and Training, Muvattupuzha.

    9
    Reputation
    77
    Profile views
    25
    Posts
    2
    Followers
    3
    Following
    Joined Last Online
    Location Ramamangalam, Ernakulam Age 28

    arunksoman Unfollow Follow
    Raspberry Pi Hackers Arduino Lovers

    Best posts made by arunksoman

    • RE: [Solved] Help needed for face detection -deep learning

      Follow These steps

      1. Create a virtual enviroment and activate virtial environment
      python -m venv venv
      

      Activate venv for windows using following command:

      .\venv\Scripts\activate
      

      For Ubuntu:

      source venv/bin/activate
      
      1. Install necessary packages on venv
      pip install opencv-python
      
      pip install imutils
      
      1. Create Folder structure as shown below in your workspace
      TestPrograms  
      |
      ├─ cascades
      │  └─ haarcascade_frontalface_default.xml
      ├─ detect_faces.py
      ├─ images
      │  └─ obama.jpg
      ├─ utilities
      │  └─ facedetector.py
      
      
      1. Program for utililities/facedetector.py given below:
      import cv2
      class FaceDetector:
          def __init__(self, face_cascade_path):
              # Load the face detector
              self.face_cascade = cv2.CascadeClassifier(face_cascade_path)
      
          def detect(self, image, scale_factor=1.2, min_neighbors=3):
              # Detect faces in the image
              boxes = self.face_cascade.detectMultiScale(image, scale_factor, min_neighbors, flags=cv2.CASCADE_SCALE_IMAGE, minSize=(30,30))
      
              # Return the bounding boxes
              return boxes
      
      1. program on detect_faces.py
      from utilities.facedetector import FaceDetector
      import imutils
      import cv2
      
      # Define paths
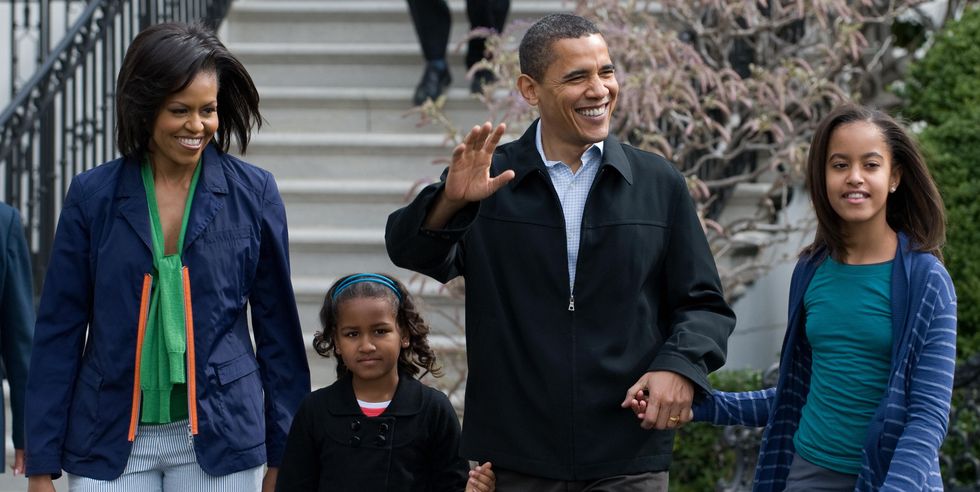
      image_path = 'images/obama.jpg'
      cascade_path = 'cascades/haarcascade_frontalface_default.xml'
      
      # Load the image and convert it to greyscale
      image = cv2.imread(image_path)
      image = imutils.resize(image, 600, 600)
      gray = cv2.cvtColor(image, cv2.COLOR_BGR2GRAY)
      
      # Find faces in the image
      detector = FaceDetector(cascade_path)
      face_boxes = detector.detect(gray, 1.2, 5)
      print("{} face(s) found".format(len(face_boxes)))
      
      # Loop over the faces and draw a rectangle around each
      for (x, y, w, h) in face_boxes:
          cv2.rectangle(image, (x, y), (x + w, y + h), (0, 255, 0), 2)
      
      # Show the detected faces
      cv2.imshow("Faces", image)
      if(cv2.waitKey(0)):
       cv2.destroyAllWindows()
      
      1. Links to necessary files:
        Haar cascade frontal face
        Obama Family Image
      posted in General Discussion
      A
      arunksoman
    • RE: [Solved] Help needed for face detection -deep learning

      @Nandu But I have to mention that it is not a deep learning method. It is based on Integral images(Viola-Jones algorithm), which is basically something about ML. From opencv 3.4.3 there is a DNN module. This module help us to load caffemodels, torch models as well as tensorflow models. You can find out caffemodels on the Internet in order to detect faces. Using those we can make face detection quite efficiently. If you have any doubt feel free to ask here.

      posted in General Discussion
      A
      arunksoman
    • RE: how did sudo command solved can't open device "/dev/ttyUSB0": Permission denied?
      1. Go to Arduino software
      2. Download Linnux 64-bit or 32-bit software
      3. Extract the Downloaded tar.xz file on your home directory.
      4. Navigate to your extracted file using cd command:
        cd arduino-1.8.12-linux64
      5. Make the install.sh file executable:
        sudo chmod +x install.sh
      6. Install arduino using shell script
        sudo ./install.sh
      7. Open Terminal and type:
        ls -l /dev/ttyACM*
        you will get something like:
        crw-rw---- 1 root dialout 188, 0 5 apr 23.01 ttyACM0
        The "0" at the end of ACM might be a different number, or multiple entries might be returned. The data we need is "dialout" (is the group owner of the file).
        Now we just need to add our user to the group:
        sudo usermod -a -G dialout <username>

      I believes it is a better way to solve your problem. Other way you to try to solve problem is install arduino via:
      sudo apt-get install arduino-core

      posted in General Discussion
      A
      arunksoman
    • RE: A little hassle with ESP32..!!

      Try to implement espnow protocol in order to communicate with client esp32.

      posted in ESP32
      A
      arunksoman
    • RE: Error on Raspberry PI 4 while opening TensorFlow.

      @sreu13 You have to deploy a flask server on your Google cloud instance. Also create local flask server on your RasPi. Upload your image on RasPi flask server. Convert image to base64 format. Send naseer image to flask server deployed on Google cloud instance. Then convert back base64 normal image file. Then process image on your flask server. It might solve your problem.

      posted in General Discussion
      A
      arunksoman
    • RE: A little hassle with ESP32..!!

      @kowshik1729 If you are using Arduino include espnow.h. Then you have create a structure in order to store your message. The message should not greater than 250 bytes. Then create a call back function(for knowing the message delivery is success or failure) and send message to client using MAC address. This protocol can send encrypted or non-encrypted message up to 220m. There is a better tutorial available on RandomNerdTutorials. One more thing is if you are using station mode you can connect upto 6 esp32 with your esp32 in master slave configuration. It can send data in both ways. If you are using softAP or station+softAP then it can connect up to 10-20 devices.

      posted in ESP32
      A
      arunksoman

    Latest posts made by arunksoman

    • RE: Error on Raspberry PI 4 while opening TensorFlow.

      @sreu13 You have to deploy a flask server on your Google cloud instance. Also create local flask server on your RasPi. Upload your image on RasPi flask server. Convert image to base64 format. Send naseer image to flask server deployed on Google cloud instance. Then convert back base64 normal image file. Then process image on your flask server. It might solve your problem.

      posted in General Discussion
      A
      arunksoman
    • RE: Error on Raspberry PI 4 while opening TensorFlow.

      @sreu13 It is possible and a far far better method.

      posted in General Discussion
      A
      arunksoman
    • RE: Error on Raspberry PI 4 while opening TensorFlow.

      @sreu13 I edited comment please read that again. Most probably it will not effect your file system. In some scenarios it can create worse effect.

      posted in General Discussion
      A
      arunksoman
    • RE: Error on Raspberry PI 4 while opening TensorFlow.

      @sreu13
      Ensure that you are installed tensorflow 1.x since screenshot of your code shows something like
      from keras.layers.convolution import covolution2D
      It is not correct in case for tensorflow 2.0 since keras api is part of tensorflow itself.

      Another thing is try to expand your file system. It should be do with your own risk.

      1. sudo raspi-config
      2. Navigate to Advanced options
      3. Select advanced options and hit enter(I believes tab key is useful here)
      4. Choose Expand File System and hit enter finish.
      5. Then your pi may prompt to reboot. If it didn't run. Execute
        sudo reboot
      6. Then execute following commands one by one:
      $ sudo apt-get purge wolfram-engine
      $ sudo apt-get purge libreoffice*
      $ sudo apt-get clean
      $ sudo apt-get autoremove
      
      1. Then increase swap memory by editing following file swapfile:
        $ sudo nano /etc/dphys-swapfile
      2. It will open nano editor. Navigate to variable
      CONF_SWAPSIZE=100
      

      It indicates your current swap is only 100mb.
      So you just have to increase by commenting down this line and increase to appropriate value something like shown below for 2GB swap:

      #CONF_SWAPSIZE=100
      CONF_SWAPSIZE=2048
      
      1. Save the file and exit nano editor.
      2. sudo reboot

      I believes if it did not helped you, you have to think about MOVIDIUS or NVIDIA Jetson nano etc.

      posted in General Discussion
      A
      arunksoman
    • RE: how did sudo command solved can't open device "/dev/ttyUSB0": Permission denied?

      @Abhay I think most probably you might have done this earlier while installing Arduino.

      posted in General Discussion
      A
      arunksoman
    • RE: how did sudo command solved can't open device "/dev/ttyUSB0": Permission denied?

      @Abhay What did you mean by usual steps?

      posted in General Discussion
      A
      arunksoman
    • RE: Error on Raspberry PI 4 while opening TensorFlow.

      @sreu13 What is the version of tensorflow you are using? Did you read the tensorflow docs? You can't do simply
      pip install tensorflow
      for Python 3.7 version.

      posted in General Discussion
      A
      arunksoman
    • RE: Error on Raspberry PI 4 while opening TensorFlow.

      Your are using a bleeding edge python software for tensorflow. I believes it is python 3.7 or python 3.8 or something. Try to downgrade your python to 3.6.5 or other compatible version by refereing documentation.

      posted in General Discussion
      A
      arunksoman
    • RE: how did sudo command solved can't open device "/dev/ttyUSB0": Permission denied?
      1. Go to Arduino software
      2. Download Linnux 64-bit or 32-bit software
      3. Extract the Downloaded tar.xz file on your home directory.
      4. Navigate to your extracted file using cd command:
        cd arduino-1.8.12-linux64
      5. Make the install.sh file executable:
        sudo chmod +x install.sh
      6. Install arduino using shell script
        sudo ./install.sh
      7. Open Terminal and type:
        ls -l /dev/ttyACM*
        you will get something like:
        crw-rw---- 1 root dialout 188, 0 5 apr 23.01 ttyACM0
        The "0" at the end of ACM might be a different number, or multiple entries might be returned. The data we need is "dialout" (is the group owner of the file).
        Now we just need to add our user to the group:
        sudo usermod -a -G dialout <username>

      I believes it is a better way to solve your problem. Other way you to try to solve problem is install arduino via:
      sudo apt-get install arduino-core

      posted in General Discussion
      A
      arunksoman
    • RE: A little hassle with ESP32..!!

      @kowshik1729 Did you read Espressif page and datasheet completely?

      ESP-NOW is yet another protocol developed by Espressif, which enables multiple devices to communicate with one another without using Wi-Fi. The protocol is similar to the low-power 2.4GHz wireless connectivity that is often deployed in wireless mouses. So, the pairing between devices is needed prior to their communication. After the pairing is done, the connection is safe and peer-to-peer, with no handshake being required.
      Espressif ESP-NOW OVERVIEW

      "The ESP-Now protocol is connection-less, you don't need to set up a session/get an ip-address to communicate between nodes. This saves time and battery power, exactly what we need. "
      revspace

      Also You can try this protocol with deep sleep mode.

      posted in ESP32
      A
      arunksoman