Getting Started with Azure Sphere MT620
-
Here is the Getting Started with Azure Sphere MT620, please share your suggestion and opinions

This blog post will explain how to set up and run a Hello-World program in Microsoft Azure Sphere MT620 for the first time. If you already did the setup then skip the whole post.
Prerequisites:
-
An Azure Sphere Development Kit
-
A PC running Windows 10 Anniversary Update or later
-
Visual Studio 2019 Enterprise, Professional, or Community version 16.04 or later; or Visual Studio 2017 version 15.9 or later.
https://blog.makergram.com/setup-microsoft-azure-sphere-mt620/
-
Recent Posts
-

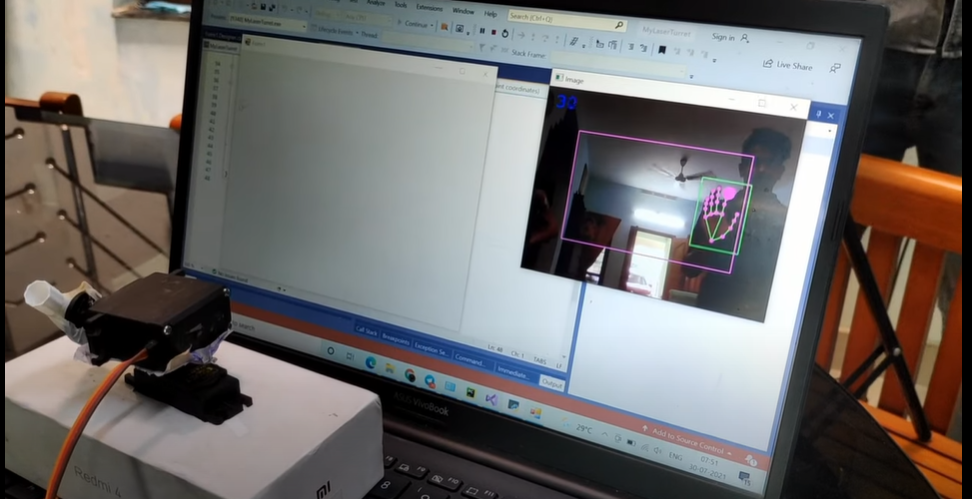
@athulkrishnakdlr Nice Project, Could you please share more about the technical aspects? What Dev kit are you using and how do you translate coordinates from OpenCV to the servo? Thanks

 .
. -
A
This is a gesture controlled laser turret,we can control the movement of laser by hand movement.With the help of OpenCV we move the mouse in computer by hand control
-

Very much informative!!!!
-
If you are using raspberry pi as one of your main computers and have separate monitor, keyboard and mouse, then you might be tired of copy and pasting terminal commands and codes while doing projects with raspberry pi, because running chromium-browser and reading tutorial will pi slower and using a sperate keyboard and mouse use our workbench space too.
recently I read a blog Share your keyboard and mouse between computers with Barrier by Gordon Hollingworth which is cool.
In that blog, he mentioned a software called barrier, it's a software that will allow you to use a single keyboard and mouse to control multiple computers by physically turning a dial on the box to switch the machine you're controlling at any given moment. The barrier does this in software, allowing you to tell it which machine to control by moving your mouse to the edge of the screen, or by using a keypress to switch focus to a different system.
Follow these to share your computer keyboard and mouse with the raspberry pi
First, we need setup raspberry pi
Step 1: Download and Install Raspberry Pi OS on SD Card
Step 2: Connect raspberry pi to the wi-fi network
Step 3: Install barrier, for that open your terminal (Ctrl + T) and paste or enter the following
sudo apt install barrierThen click enter.
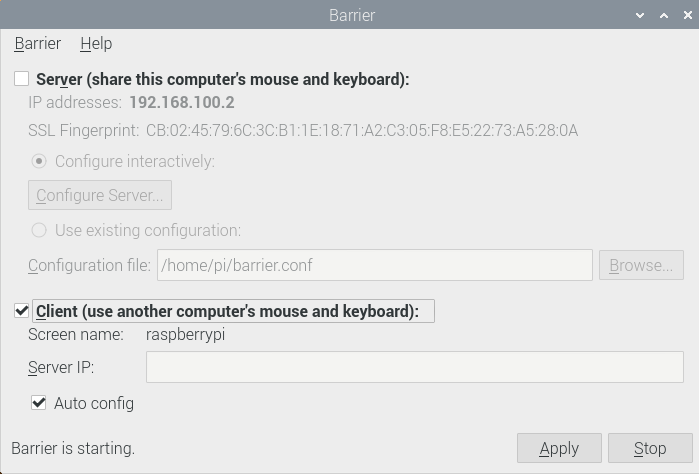
Step 4: Setup barrier, Open barrier by typing barrier on the terminal, if you successfully installed the barrier you can see like this.
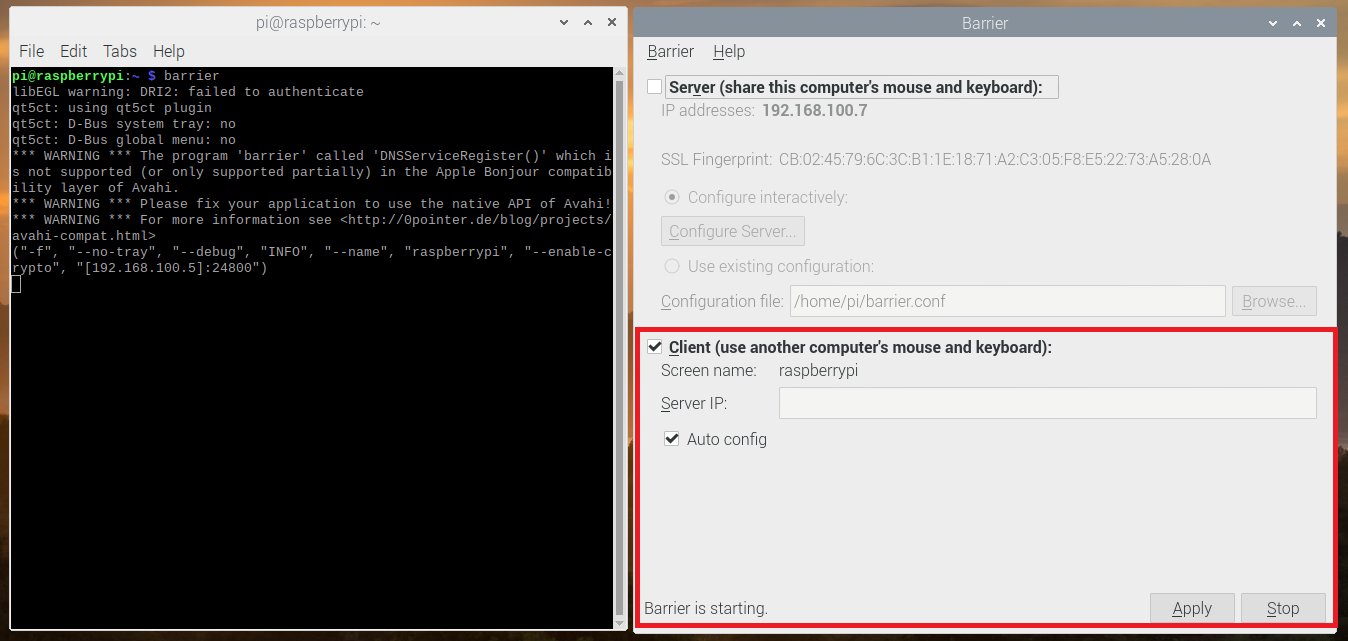
Select option Client (Use another computer's mouse and keyboard) and Select Auto config option too, also note the Screen name, which we need for the server.
That's all next we need to set up the desktop/laptop computer.
Step 5: Download and Install barrier on desktop or laptop computer (The Server), download link
Step 6: Set up the barrier by selecting Server and position your monitor on barrier software.
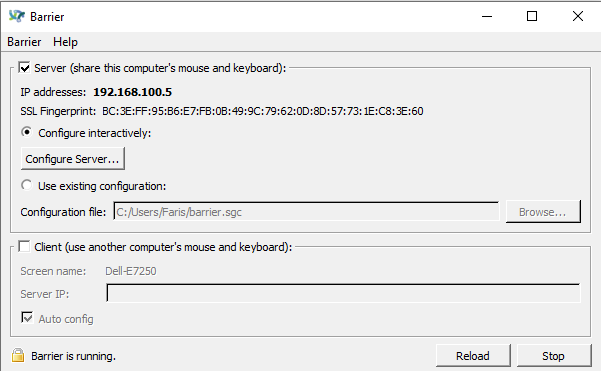
To Position, the screen clicks the configure server.
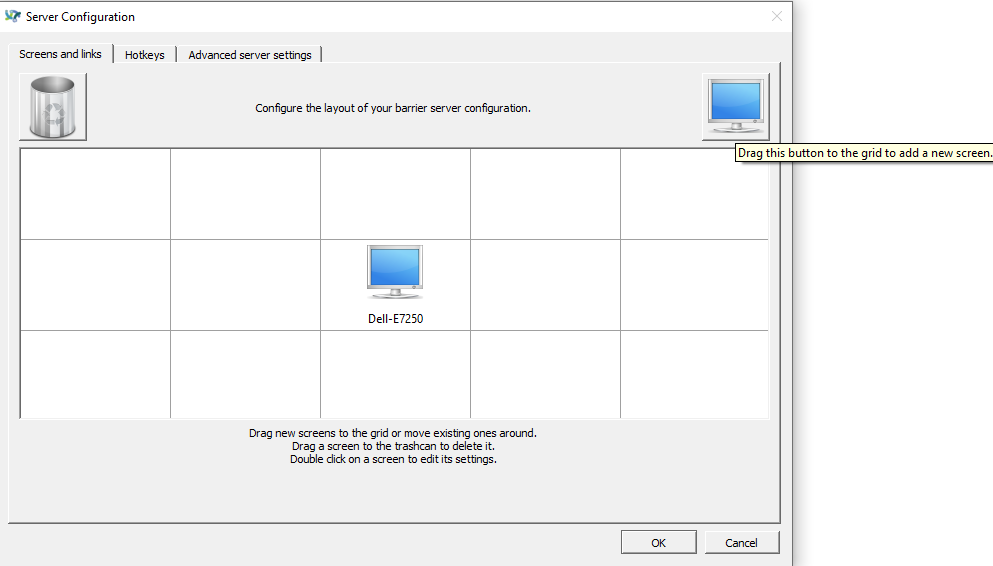
Here, to drag and drop the monitor icon to the desired position you need on the grid.
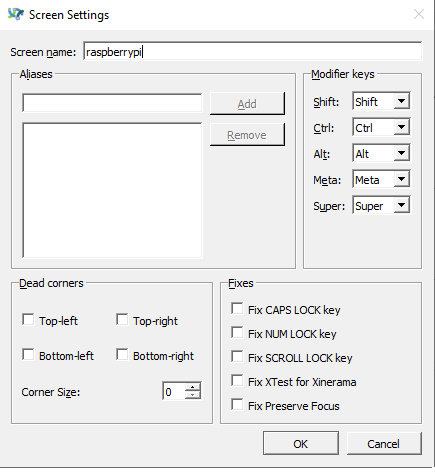
double click the screen and set the screen name, you can obtain the screen name from the raspberry pi barrier client. (See Step 4)
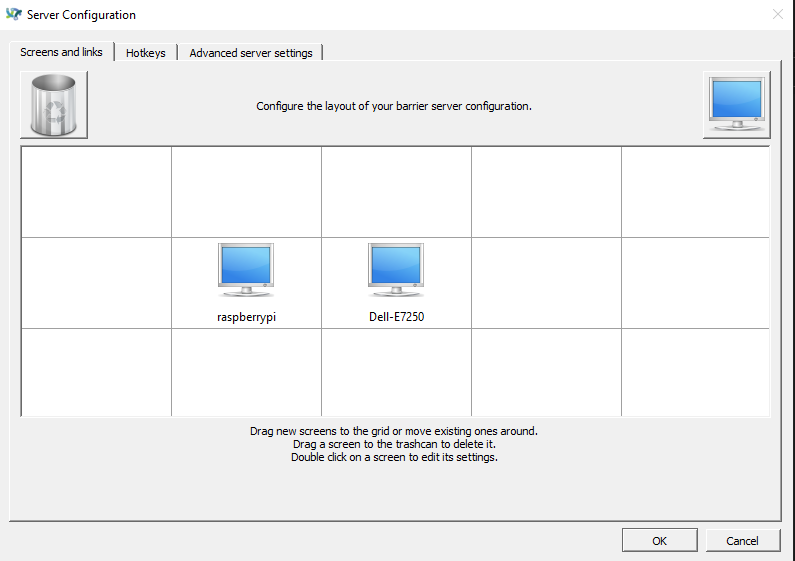
after setup, it should be like this. Then click OK
in the following screen, click Apply and Just wait few seconds then try to move the mouse to the corner. Yes, It should work.