Multi Thread Handling for normal Processes using python
-
Hello all,
I would like to know whether we can handle two different processes using python? like how our usual OS's do. For instance, I am using raspberry pi for reading video frames and at the same instance I'm handling a function where I am playing audio on speaker. Can I do both the things at the same time using two different individual threads on raspberry pi?If yes, please suggest me how can I achieve this. Thanks in advance..!!
-
I suggest you multiprocessing to handle dlifferent processes.
Use multiprocessing.Process.
If you want to establish a communication between parent and child process, use multiprocessing.Queue or multiprocessing.Pipe -
@jerinisready Thank you soo much. Is
Multiprocessing.processis an python library? Can i get it through PIP installer? -
Hi @kowshik1729 ,
Yes, you can do Multi Thread in Raspberry Pi using python and note that different threads do not actually execute at the same time: they merely appear to.
We can easily implement simple threads using threading module. I'll show you some example of how actually it works.
Example :
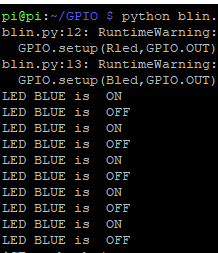
I was trying to blink two LED's at the same time, for that I created a function that does the blink infinitely using while(True) .import RPi.GPIO as GPIO import time Rled = 12 Bled = 6 GPIO.setmode(GPIO.BCM) GPIO.setup(Rled,GPIO.OUT) GPIO.setup(Bled,GPIO.OUT) def blue(): while True: print "LED BLUE is ON" GPIO.output(Bled,GPIO.LOW) time.sleep(1) print "LED BLUE is OFF" GPIO.output(Bled,GPIO.HIGH) time.sleep(1) def red(): while True: print "LED RED is ON" GPIO.output(Rled,GPIO.LOW) time.sleep(1) print "LED RED is OFF" GPIO.output(Rled,GPIO.HIGH) time.sleep(1) blue() red()Output :
Video : https://www.youtube.com/watch?v=AypMEQFpEWo&feature=youtu.be
since we are using the infinity loop for both methods, the blue() will not stop and red() will not invoke either.
In these scenarios, we can use multithread both function without waiting for another , let's try.
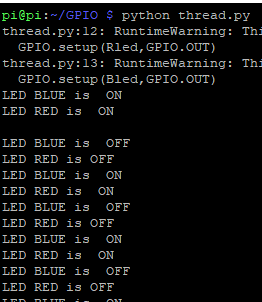
import RPi.GPIO as GPIO
import time
import threading


Rled = 12
Bled = 6

GPIO.setmode(GPIO.BCM)

GPIO.setup(Rled,GPIO.OUT)
GPIO.setup(Bled,GPIO.OUT)


def blue():
        while True:
                print "LED BLUE is  ON"
                GPIO.output(Bled,GPIO.LOW)
                time.sleep(1)
                print "LED BLUE is  OFF"
                GPIO.output(Bled,GPIO.HIGH)
                time.sleep(1)
def red():
        while True:
                print "LED RED is  ON"
                GPIO.output(Rled,GPIO.LOW)
                time.sleep(1)
                print "LED RED is OFF"
                GPIO.output(Rled,GPIO.HIGH)
                time.sleep(1)


t1 = threading.Thread(target=blue)
t2 = threading.Thread(target=red)


t1.start()
t2.start()
Output :
Video : https://www.youtube.com/watch?v=HMKYzgdNwd8&feature=youtu.be
with the help threading module we can simply run both methods at the same time (how we feel).
I think you got your answer. also, keep in mind to avoid race condition and deadlock while multithreading.
-
@kowshik1729
that's builtin at python. only thing is. you can simply import usingfrom multiprocessing import Process def my_function_to_run(*args, **kwargs): ... ... def main(): p1 = Process( target=my_function_to_run, args=('arg_01', 'arg_02', 'arg_03', ), kwargs={'key': 'value', 'another_key':True} ) p1.start() p2 = Process( target=my_function_to_run, args=('arg_01', 'arg_02', 'arg_03', ), kwargs={'key': 'value', 'another_key':True} ) p2.start() p1.join() p2.join() print("Finished!") if __name__ == '__main__': main()This Might can help: https://docs.python.org/2/library/multiprocessing.html
-
@salmanfaris Thankyou soo much for awesome example. The video really helped me what it looks like without multi threading. Thank you.
-
@kowshik1729 happy hacking and keep making.
all the best

Recent Posts
-

Hi @borncurious , For the industrial purpose you can go with Raspberry Pi compute modules, Take a look at the latest version CM4 - https://www.raspberrypi.com/products/compute-module-4/ , Which is designed for industrial usage and incorporates a quad-core ARM Cortex-A72 processor, dual video output, and a wide selection of other interfaces. Available in 32 variants, with a range of RAM and eMMC Flash options, and with or without wireless connectivity.
Other options are, boards like RockPi and Orange Pi boards which are similar to Raspberry similar model and specs but the price is a bit lower than the raspberry pi. Make sure to check the Interface and driver support that you need to incorporate into your project since these boards are not documented and maintained like the official raspberry pi as far as I know.
also, you can check Toradex System on Module.
-
-

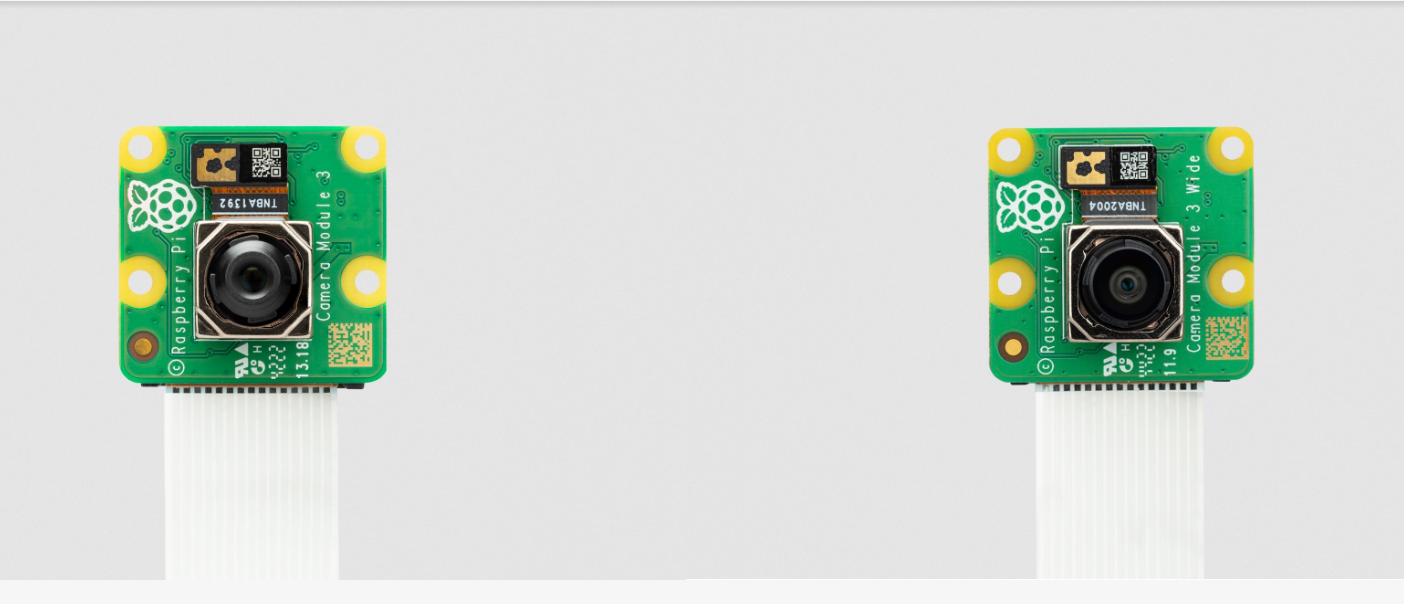
The classic compact camera for Raspberry Pi with a 12MP sensor and autofocusAvailable from $25 with your choice of standard and wide lenses, with or without an infrared filter
More details: https://www.raspberrypi.com/products/camera-module-3/
Resource:
Documentation: https://www.raspberrypi.com/documentation/accessories/camera.html
Camera Software: https://www.raspberrypi.com/documentation/computers/camera_software.html -

Hey @rafitc99 ,
Did your issue resolve? Curious to know